How To Create Custom Login Form In Drupal 8
In Drupal 8 form API is similar to Drupal 7 Form API. forms still use array structure to render the data. but having separate validation and submission form. Drupal 8 has some new (HTML 5) elements available.
New HTML 5 elements like
'tel','email','number','date','url','search','range' etc.
In Drupal 8 Form classes implement the \Drupal\Core\Form\FormBuilderInterface and the basic workflow of a form is defined by the buildForm, validateForm, and submitForm methods of the interface.
There are different classes to choose from depending on the type of form you are creating.
-
ConfigFormBase : For creating system configuration forms like the one found at admin/config/system/site-information.
-
ConfirmFormBase : For providing users with a form to confirm an action such as deleting a piece of content.
-
FormBase : The most generic base class for generating forms.
FIle structure:
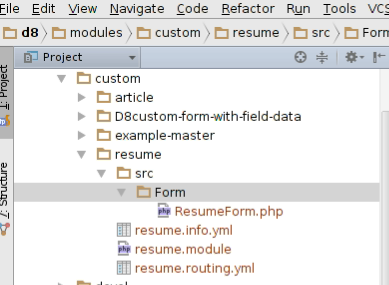
Step 1: Create .info.yml file
An essential part of a Drupal 8 module, theme, or install profile is the .info.yml file (aka, "info yaml file") to store metadata about the project.
In Drupal 8, .info file changes to .info.yml. Old .info files have been converted to YAML.
Added name, description, core, package, dependencies, type (The type key, which is new in Drupal 8, is required and indicates the type of extension, e.g. module, theme or profile.
Step 2: Creating .routing.yml
This routing system replaces the routing parts of hook_menu() in Drupal 7. The parts of hook_menu() that were used for creating menu entries, tabs.
A route is a path which returns some sort of content on.
For example, the default front page, '/node/2' is a route. When Drupal receives a request, it tries to match the requested path to a route it knows about. If the route is found, then the route's definition is used to return content. Otherwise, Drupal returns a 404.
In above code:

1. {name} element in the URL is a path parameter and is available as $name in the controller method. e.g: resume.form
2. {path name} is url to access the page. e.g; /resume/my-form
3. The {title} is title of the page. e.g: Application Form
4. {module-name} is the name of our module. e.g: resume
Step 3: ResumeForm in the Drupal\resume\Form namespace, which implements the FormInterface and is defined in the file: modules/resume/src/Form/ResumeForm.php
In modules/resume/src/Form/ResumeForm.php. First we declare the namespace, the other classes we want to use, and extend the FormBase class. Some code:

Next we use to get code from some other classes, using the use PHP keyword and then the namespace, using the PSR-4 standard, which will autoload the classes in the files that correspond to these namespaces
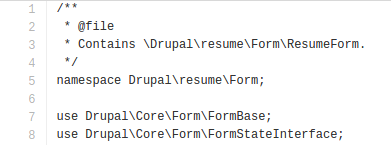
Now that we've our namespace, we'd like to use, we can declare our own class, ResumeForm extends the class FormBase, FormBase is the class we brought in as a dependency with this line: use Drupal\Core\Form\FormBase;
Form Creation: Which returns a Form API array that defines each of the elements your form is composed of.
Cypress Semiconductors Extranet - Migration to Drupal 8 from ColdFusion

Cypress is the leading global semiconductor industry, including key segments of the automotive, industrial, home automation and appliances, medical products and consumer electronics businesses. The world-class wireless technology—along with our MCUs, memories, analog ICs and USB controller which help in unparalleled position in the fast-growing Internet of Things, a business that cuts across our conventional markets and gives us a stake in exciting, next-generation segments such as connected and autonomous cars. Cypress Extranet project is an extranet portal for the Sales Representatives and Distributors. And it acts as a "one-stop shop" for Sales Representatives and Distributors. Users expect access to all the most recently valued marketing files (from the Cypress SPEC System). The site should have easy search and options to download which should accessible anywhere, anytime on road or easily while on a conference.
Validation: After a user fills out the form and clicks the submit button it's common to want to perform some sort of validation on the data that's being collected. To do this with Drupal Form API we simply implement the validate form method from
\Drupal\Core\Form\FormBuilderInterface in our ResumeForm class.
Submission: Finally, we build the submit method. According to the FormInterface, we use: public function submitForm(array &$form, FormStateInterface $form_state).
Step 4: we are done with our drupal 8 Custom form. we can review the page by typing
d8/resume/myform
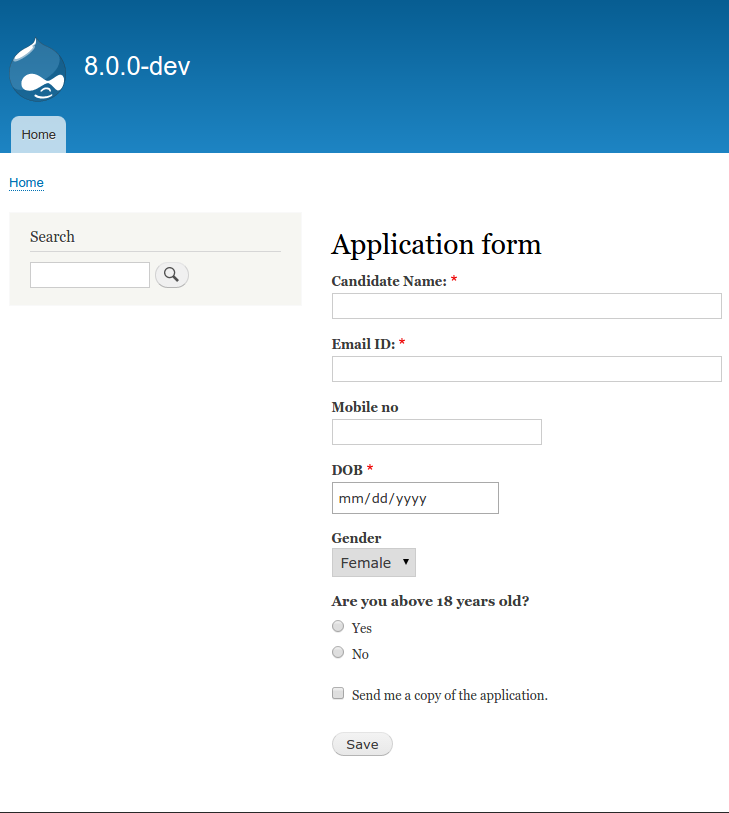
Fill up all the required field and and click on save button.
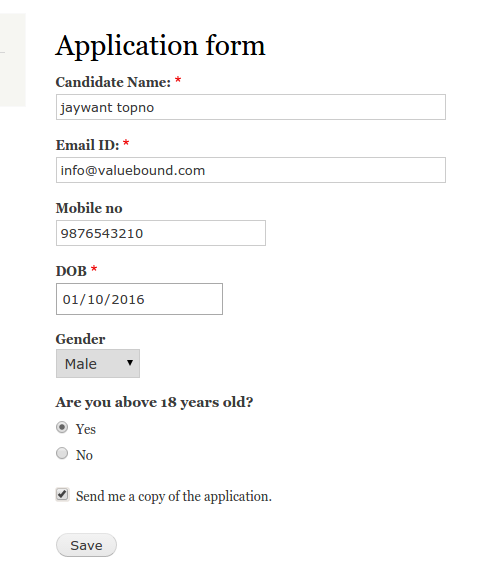
once you click on save button, you'll get saved value info. as we are displaying this in the form.
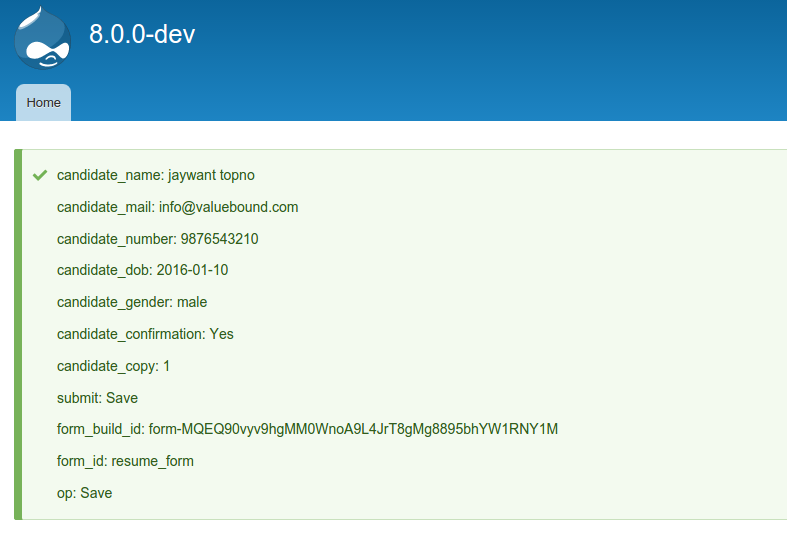
As per our Submit form source code it has to display all keys and values

Conclusion: Going through from Drupal 7 form module to Drupal 8, I learned about more than just the Drupal 8 Form API. I've learned how hook_menu got replaced by routes and controllers, in YAML files and Controller.php files. I also learned how to use classes, and find the methods I could use by looking inside interfaces.
Git Source code: https://github.com/xaiwant/D8custom-form-with-field-data
Related:
How to create custom Form with CRUD operations in Drupal 8
Creating custom contact us block with a form field in Drupal 8
Feel Free to Talk to Us for your Enterprises
How To Create Custom Login Form In Drupal 8
Source: https://www.valuebound.com/resources/blog/step-by-step-method-to-create-a-custom-form-in-drupal-8
Posted by: sainanderser.blogspot.com

0 Response to "How To Create Custom Login Form In Drupal 8"
Post a Comment